

Bucket Tool In In Design
Instructions
STEP 1: GET MY FREE CAMPING LIGHT BUCKET SVG DESIGN
You can get Design #230 which is my Camping Light Bucket SVG design file. It is available from my free resource library (get the password to the library in the form at the bottom of this post).
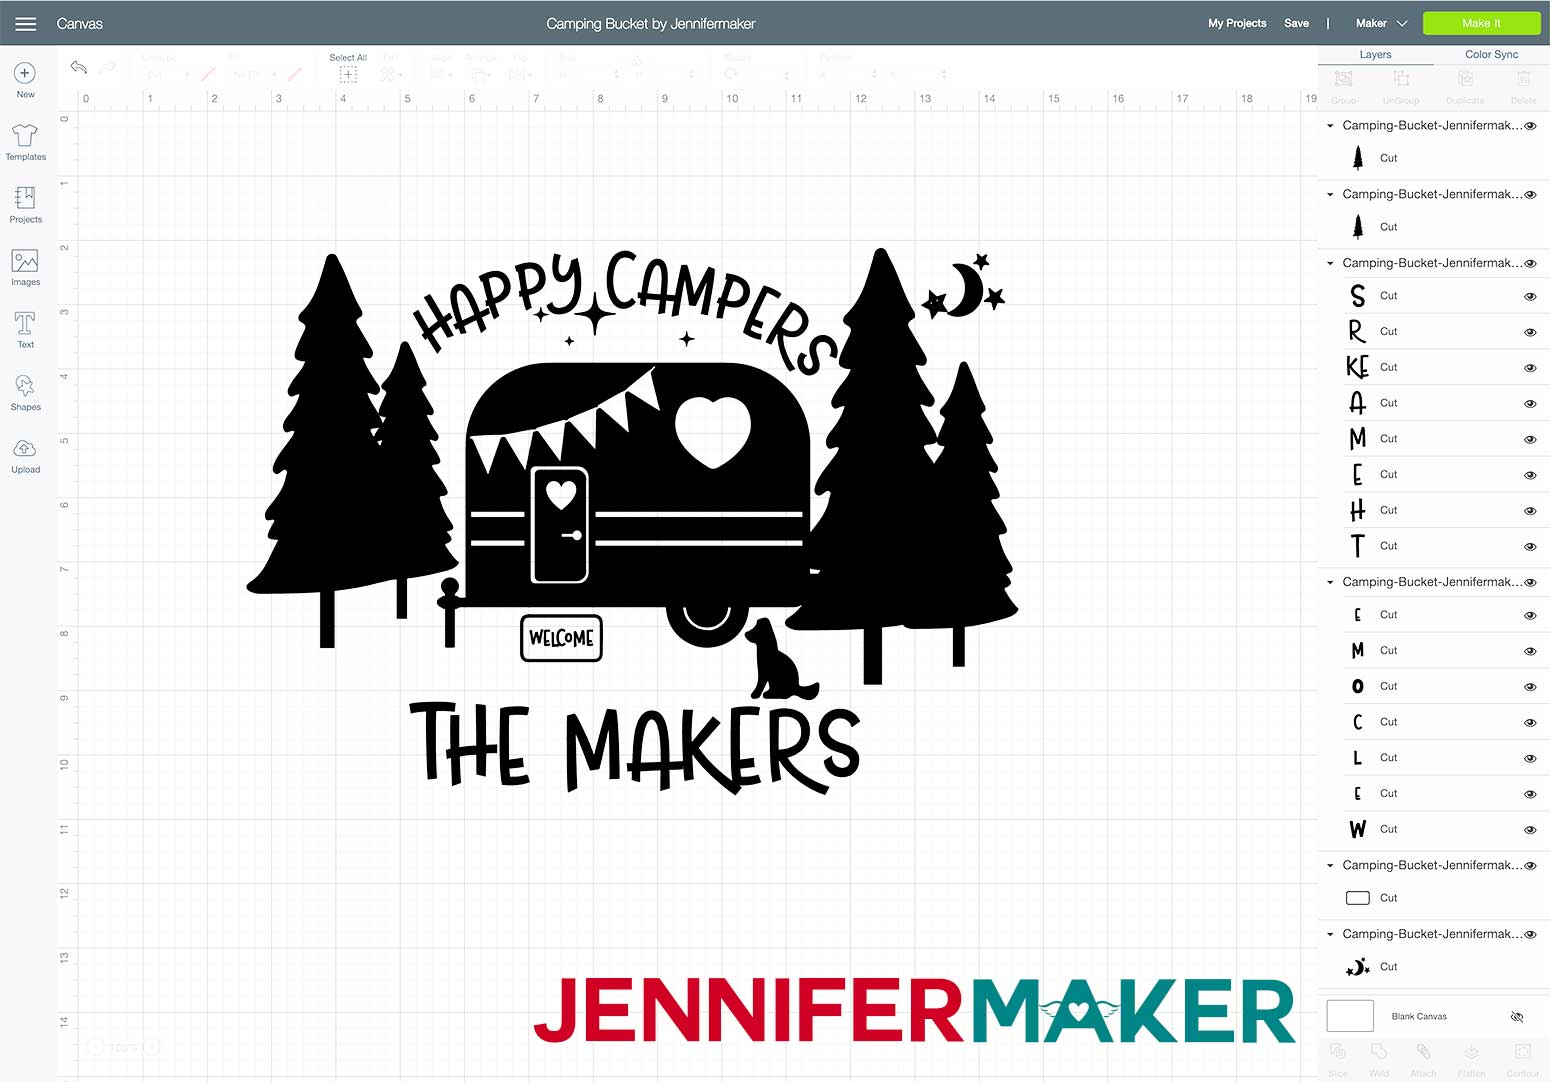
Here is what the Camping Light Bucket design file will look like when you upload it to Cricut Design Space:
Tip: If you are not sure how to upload an SVG cut file to Cricut Design Space, watch this helpful video training series I made. If you are on an iPad or iPhone, here is how to download and upload SVG files to the Cricut Design Space app.
STEP 2: PREPARE YOUR VINYL DESIGN FILE FOR CUTTING
The first thing you will want to do is to ungroup the camping light bucket SVG design. Once ungrouped, there are many elements of the design that can be duplicated or hidden, if desired.
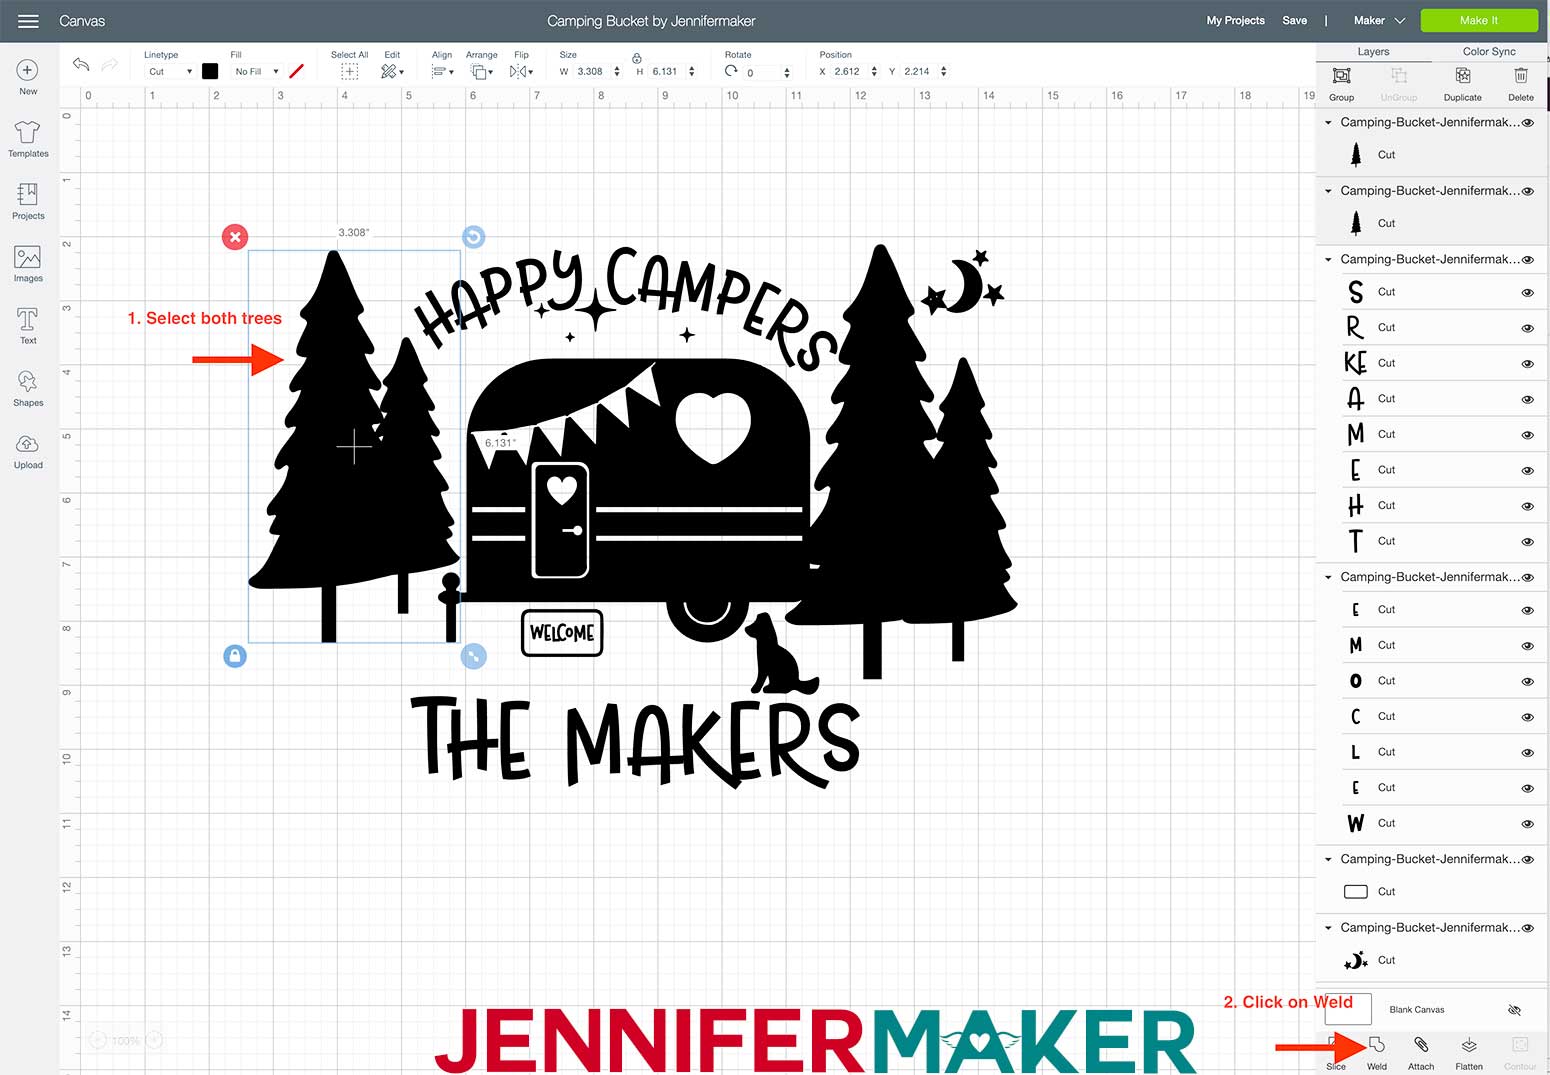
For this tutorial, I will only be decorating the front of the bucket. However, you could use any of the elements to decorate the back of the camping bucket. For example, the two trees to the left of the camper could be used on the back of the bucket or welded together and used as part of the main design as shown here.
You can easily weld the two trees on the left of the design together by simply selecting both trees and clicking Weld.
To make sure all of the pieces cut on the mat in the same place they are in your design, just select the whole design (all of the layers) and click the Attach button
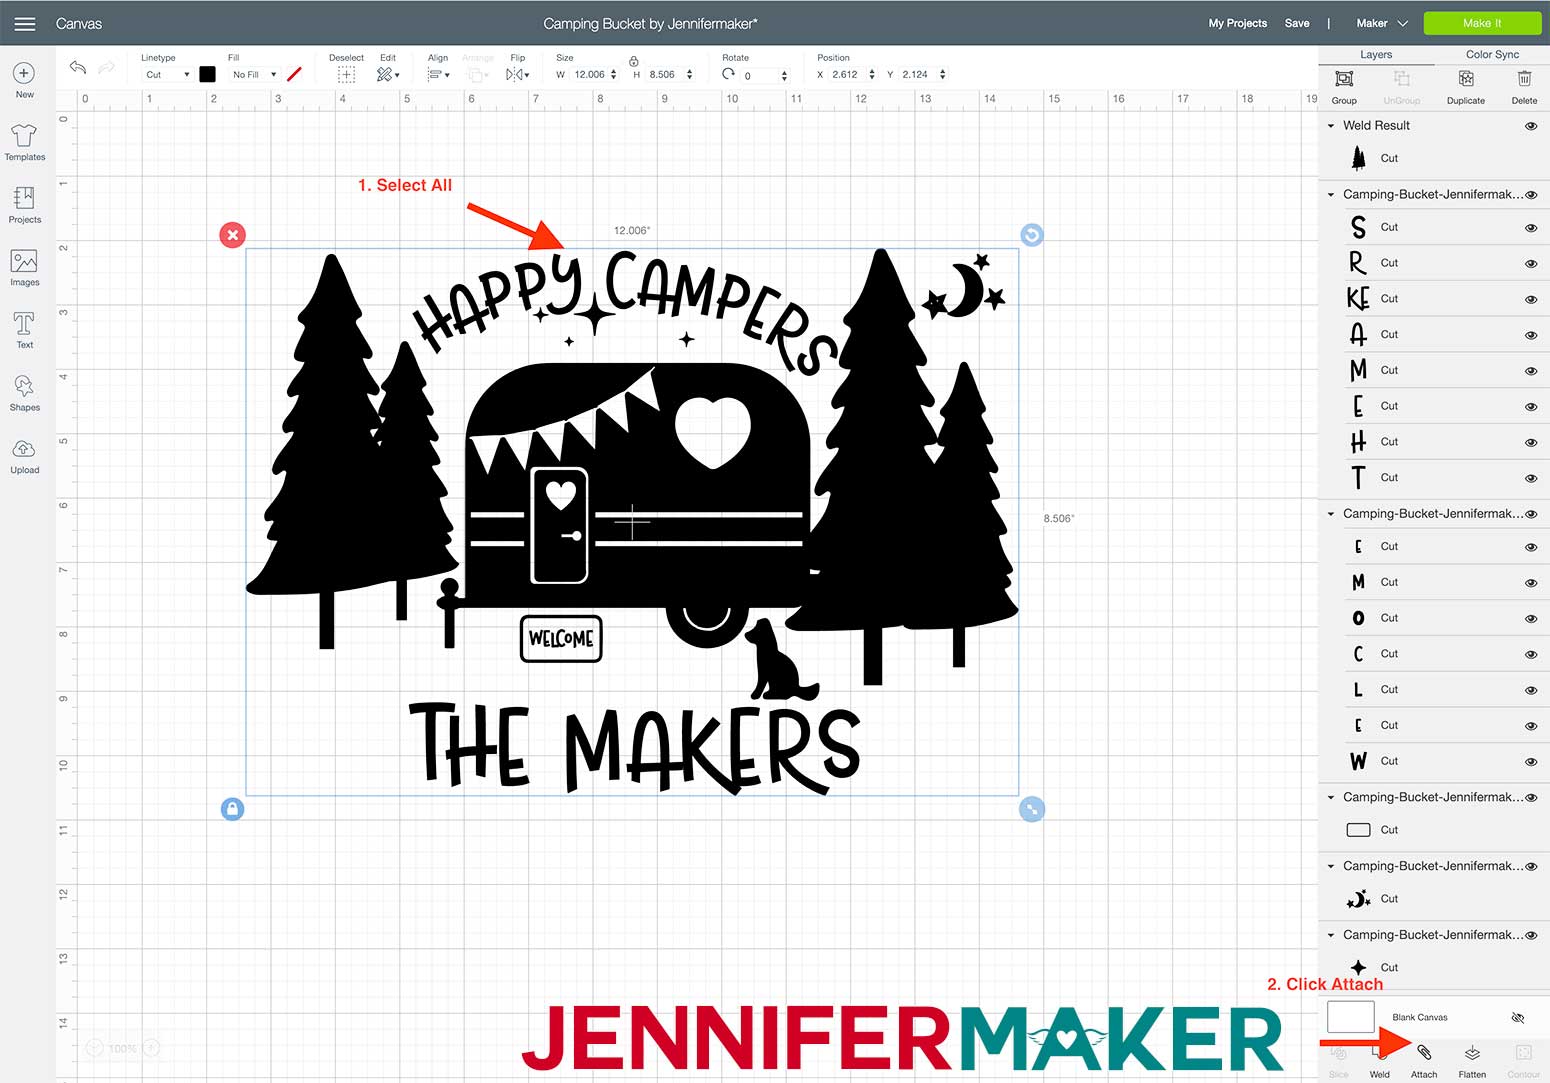
Measure your bucket and decide on a size for the design. My bucket was a 5-gallon bucket so my design will be 12" W x 8.5" H. You can resize your design as you prefer.
STEP 3: CUT YOUR CAMPING LIGHT BUCKET DESIGN
Click the Make It button and select Vinyl as your material.
Place the vinyl liner side down on a Cricut StandardGrip Cutting Mat ( I used a 12 x24 inch mat due to the size of my design) and cut your design.
If you have any issues with cutting your vinyl, take a look at my Cricut Cutting Problems post for tips to help you get cleaner cuts.
I like to weed my design on the mat. Once the design is weeded, place transfer tape on the design and flip the cutting mat over. Pull the mat away from the vinyl using your hand to hold down the cut design as you roll the mat away from the vinyl. This removal method keeps the material you're cutting from curling as it is removed from the mat.
If you have any questions about vinyl, take a look at my Ultimate Vinyl Guide for answers to some common vinyl questions.
STEP 4: APPLY YOUR DESIGN TO YOUR BUCKET
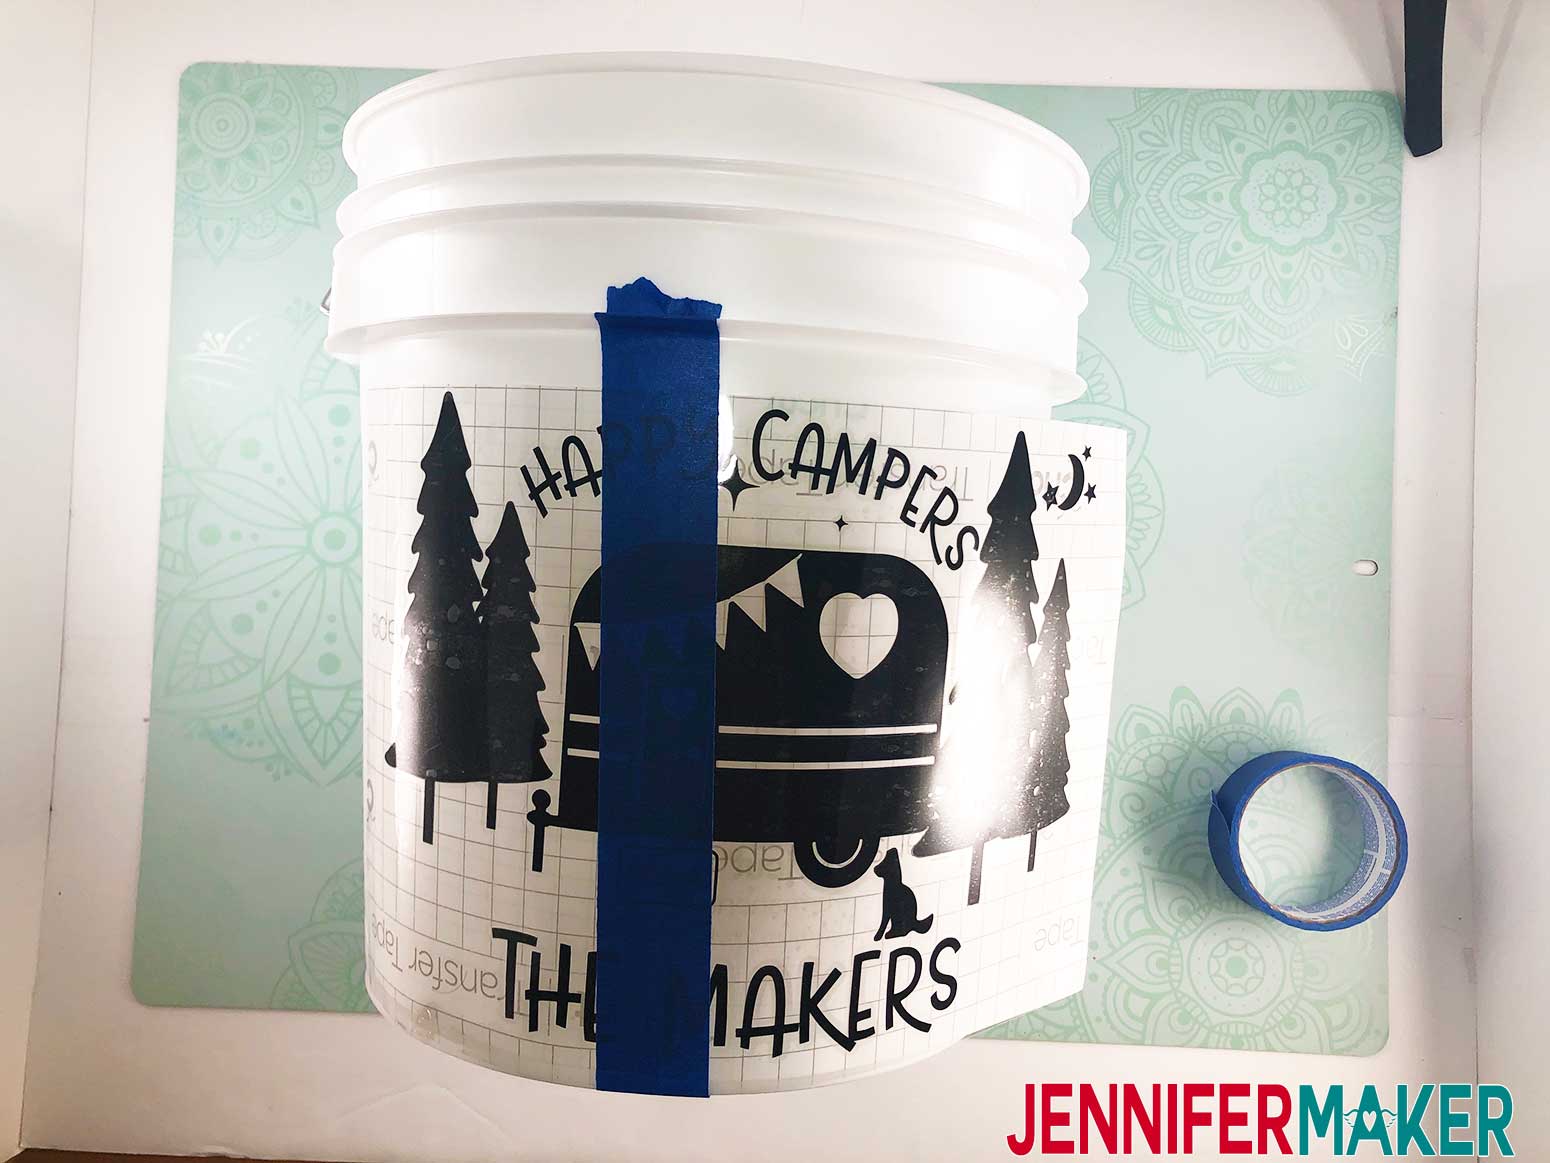
Lay your design (transfer tape is still on the vinyl) on the bucket between the handles to determine the best position.
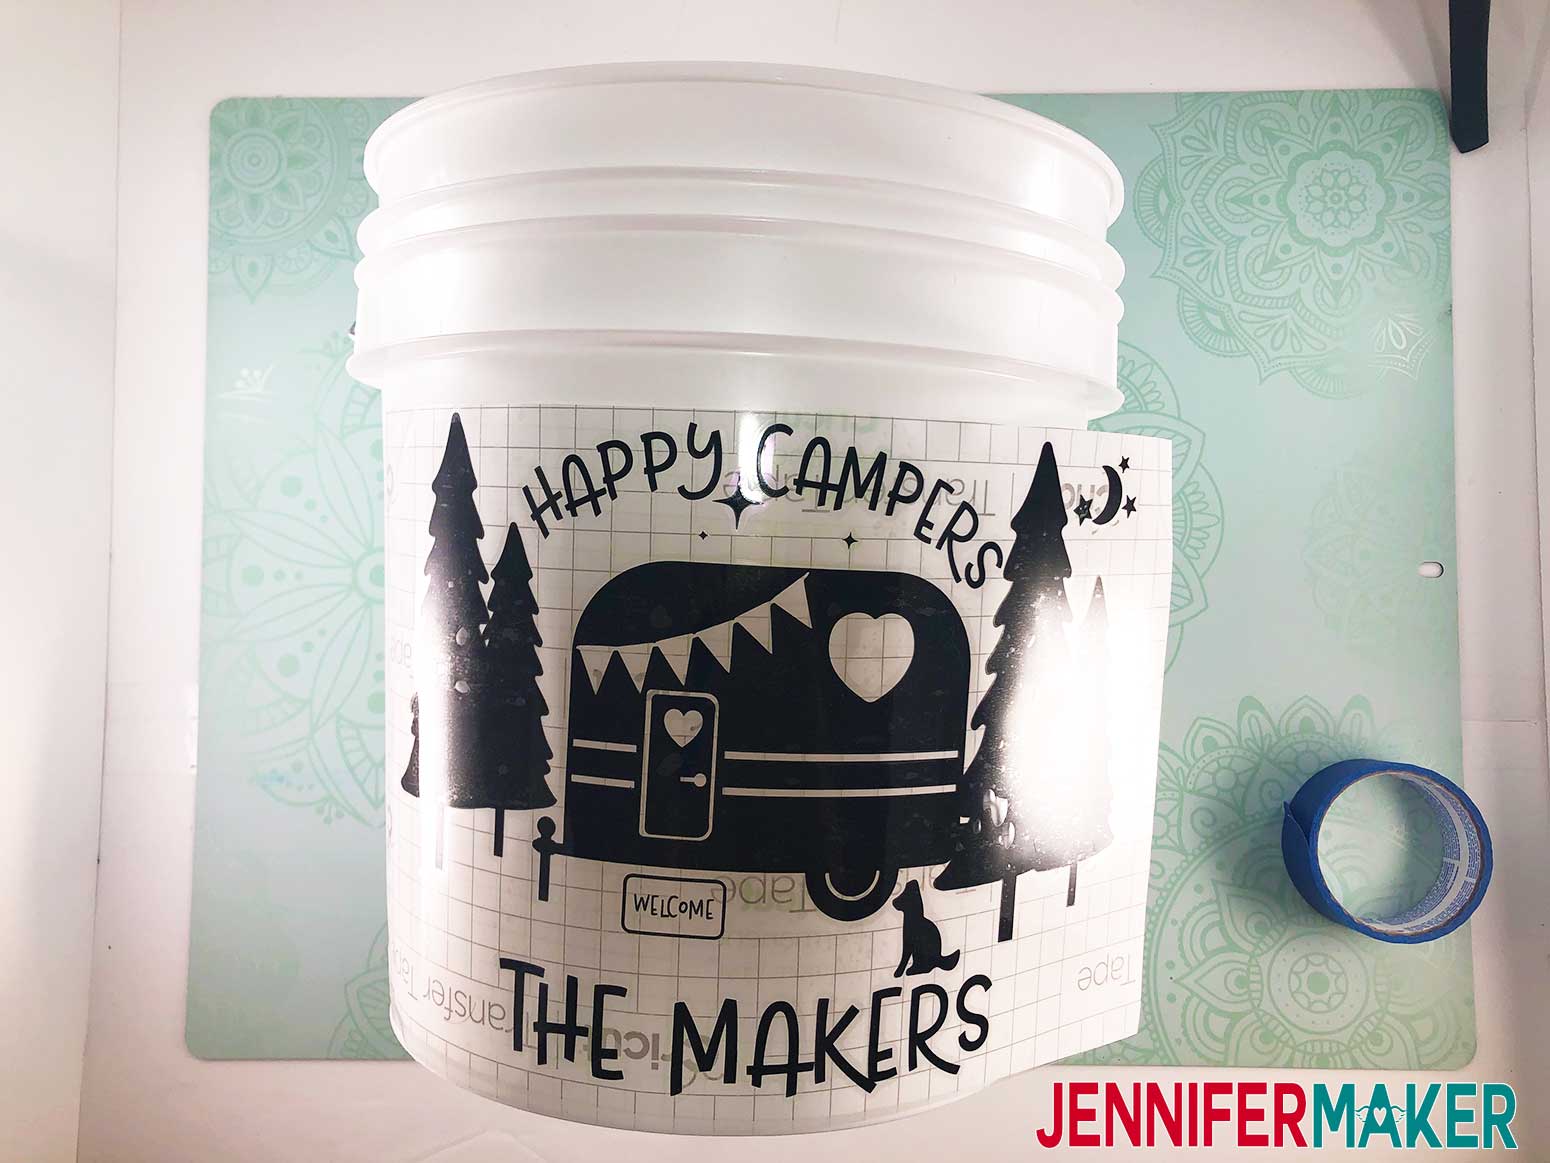
For this application, I found using the hinge method to be the easiest for me. Place a piece of painter's tape down the middle of the design (transfer tape is still on the design).
Pull one side of the design back and remove the transfer tape off that side. Cut the paper backing off. Slowly roll the design onto the bucket smoothing down with your hands as you go.
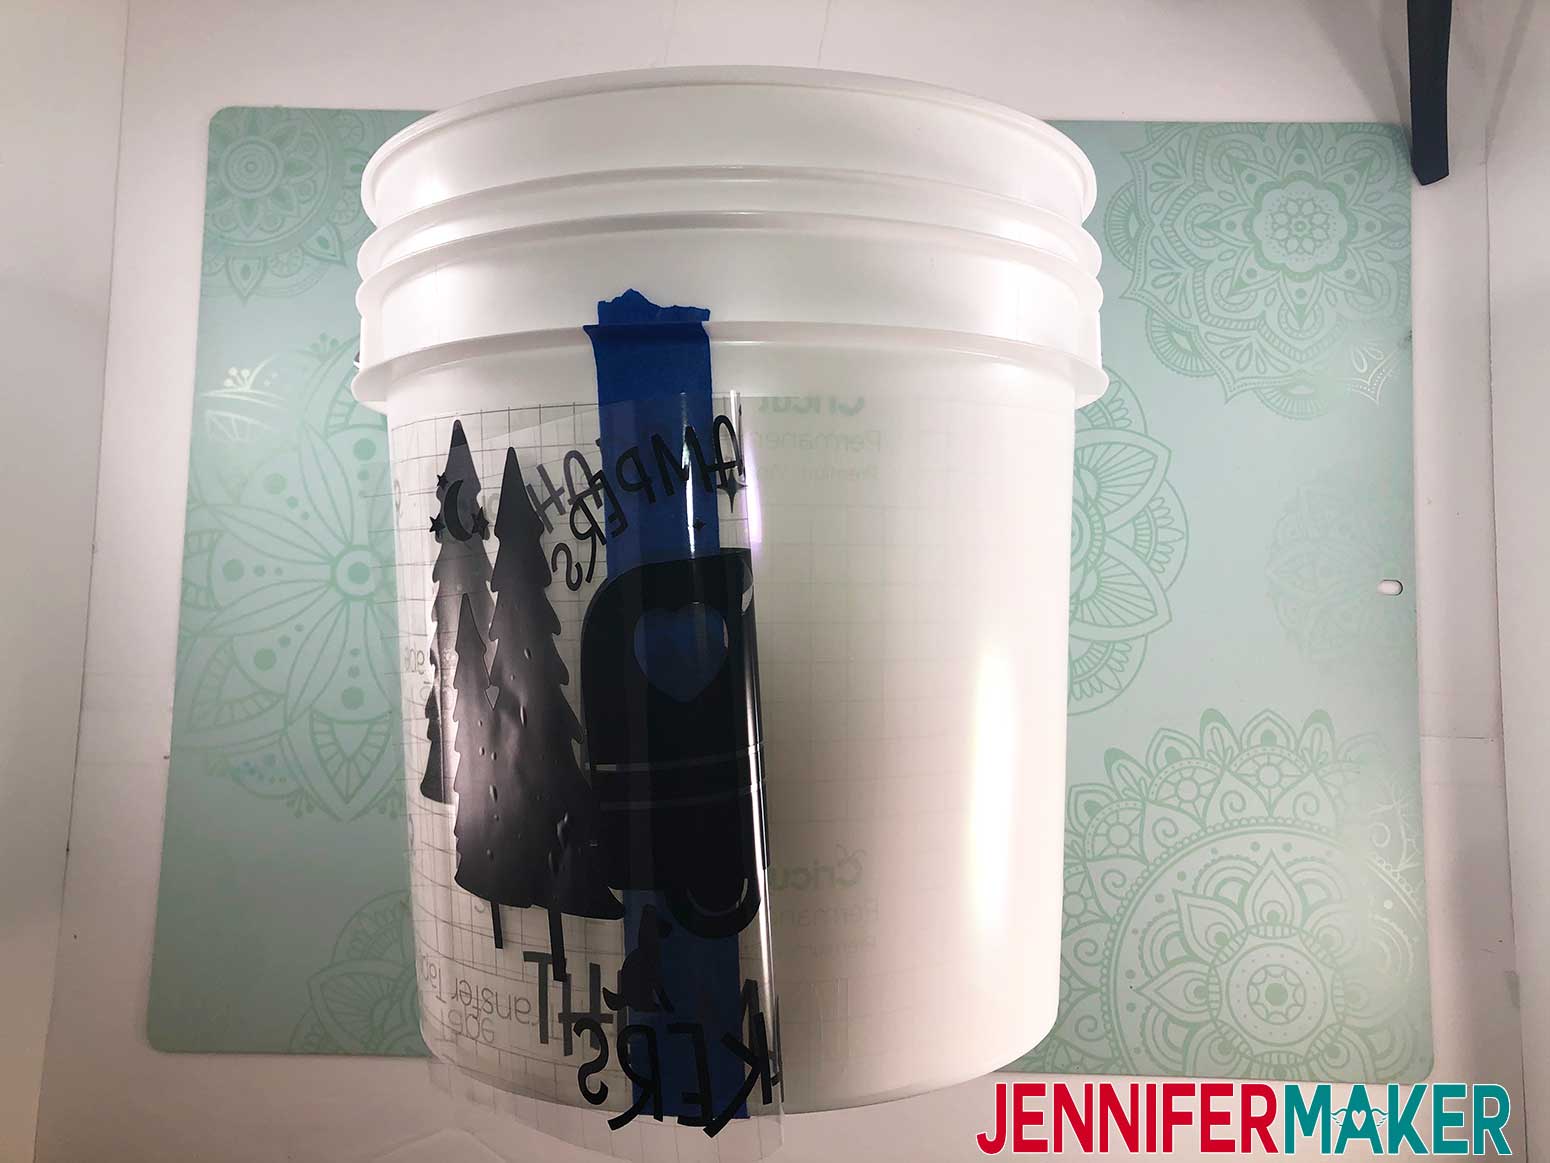
Once one side of the design is down, remove the painter's tape and repeat the process of pulling back the design on the other side, removing the paper backing and slowly rolling the design onto the bucket.
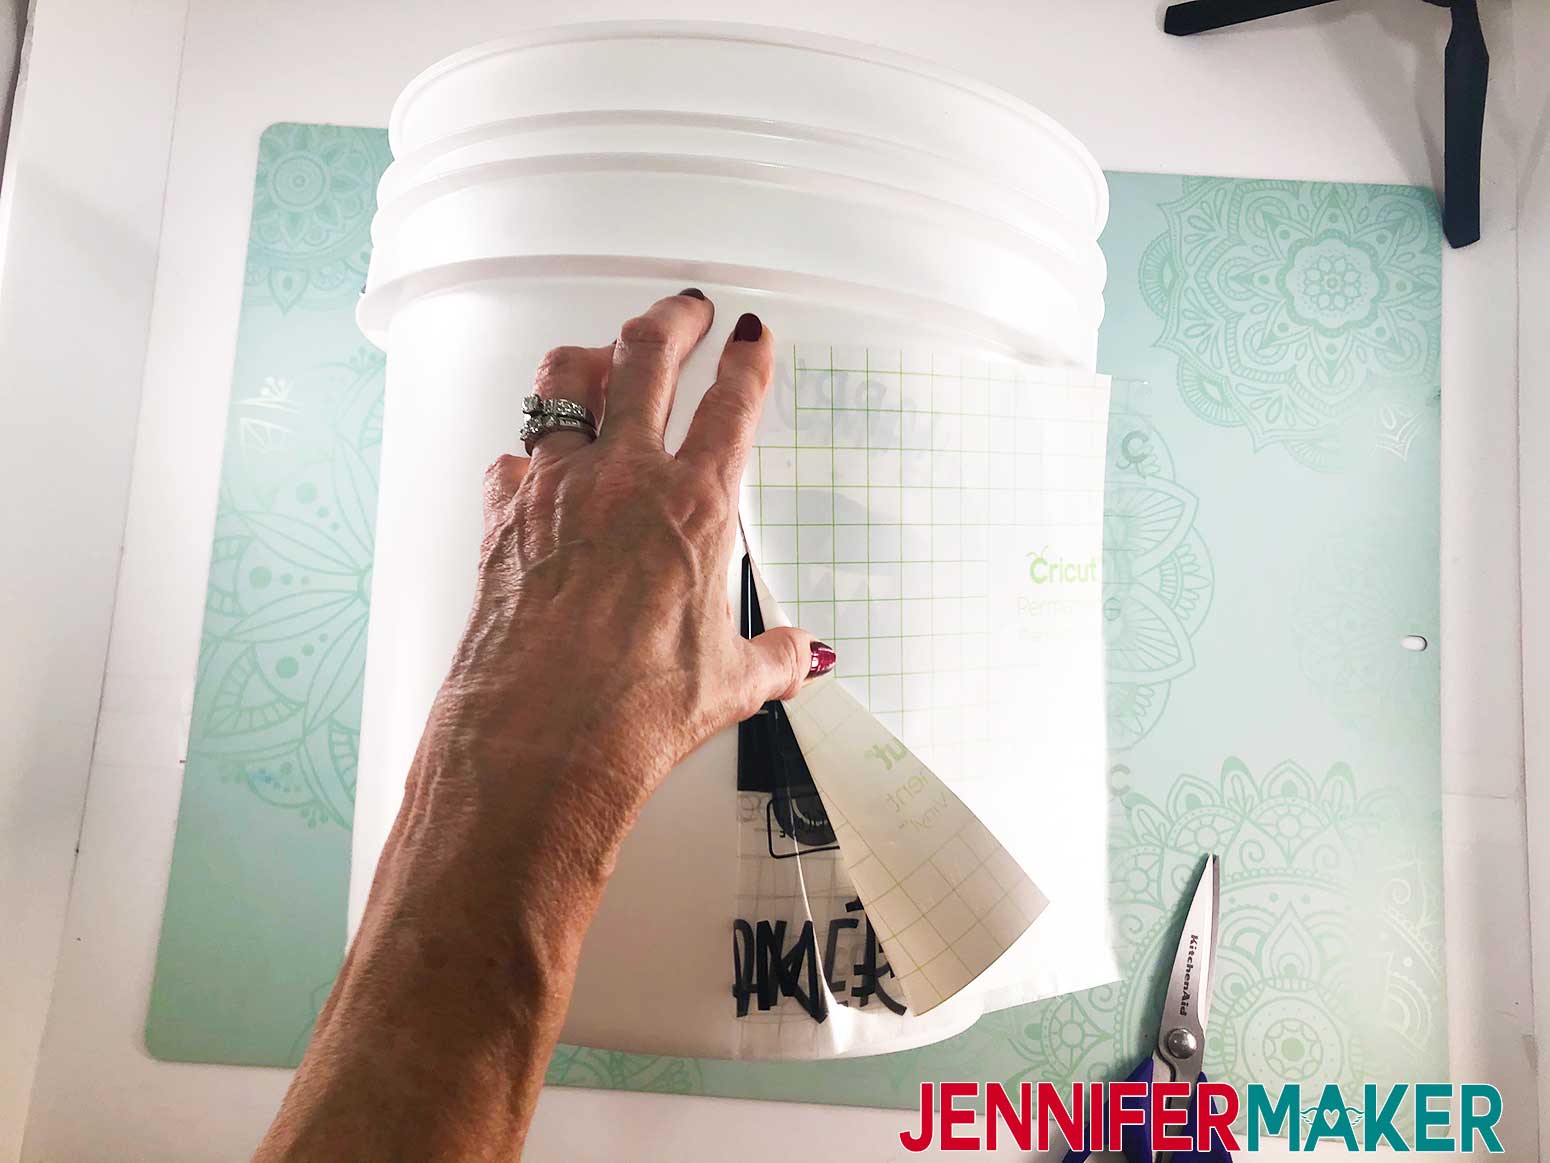
Once the design is completely applied to the bucket, use your Cricut scraper tool to burnish the vinyl to the bucket.
Remove the transfer tape.
NOTE: You may notice a few small bubbles in your vinyl, this is normal and most of the time can be worked out by pressing the bubble to the edge of the vinyl. If there are stubborn areas that will not move, you could take a pin and poke a small hole in the bubble then press down with your fingers.
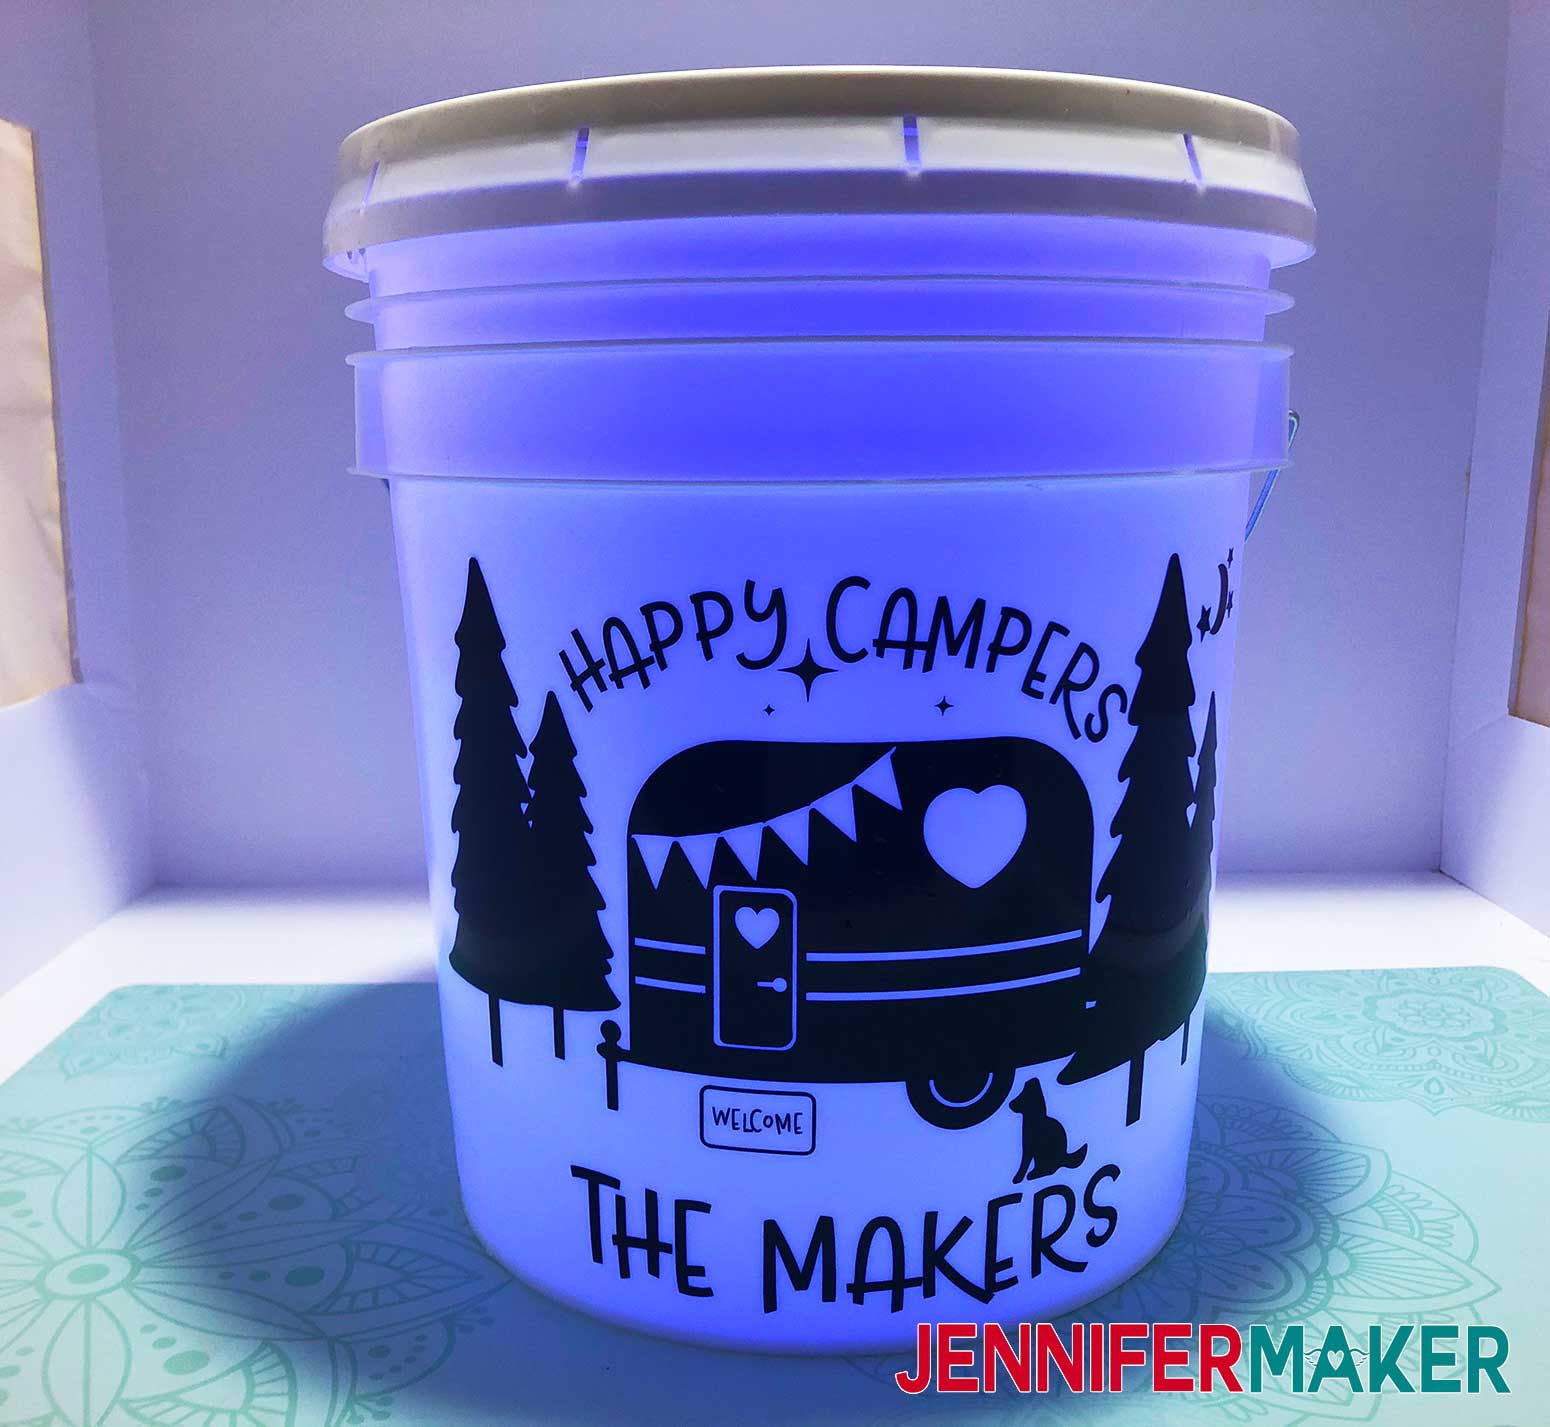
STEP 4: ADDING LIGHTS
The last step to creating this fun camping bucket is to add lights! We used submersible lights. Many campers will fill their buckets with water to keep them from blowing away. The submersible light can be placed in the bottom of the bucket, or you can use a velcro strip and velcro the light to the inside of the lid. These are so fun to make and display and I can't wait to see your buckets.
Bucket Tool In In Design
Source: https://jennifermaker.com/camping-light-bucket/
Posted by: browngribetwouter.blogspot.com
0 Response to "Bucket Tool In In Design"
Post a Comment